Recent Updates

We launched AI learning feature.

How I Started Investing With Just $10 a Week

How I Started Investing With Just $10 a Week

Let’s be real—when you’re living paycheck to paycheck or dealing with student loans, investing can feel completely out of reach. That’s exactly how I felt. I thought investing was for people who wore suits, read financial news over espresso, and had thousands to drop into the stock market.

Spoiler alert: it’s not.

I started my investing journey with just $10 a week, and it completely changed how I viewed money, building wealth, and my financial future. If you’re wondering how to invest in stocks with little money, this article is for you.

I’m going to walk you through exactly what I did, the tools I used, and the lessons I learned—mistakes included.

Why I Thought I Couldn’t Invest (At First)
Before I started, I had all the usual doubts:

  • I don’t have enough money.
  • What if I lose it all?
  • I should wait until I can invest more.
  • The problem? I kept waiting. And while I waited, my money just sat there—not growing, not working for me.

Then I heard someone say:

  • Start small. Start now. Let time do the heavy lifting.
  • That’s when I realized I didn’t need $1,000 or even $100. I just needed to begin.

 The Power of $10 a Week

It doesn’t sound like much. That’s a couple of coffees or one fast-food run. But here’s what $10 a week can do:

  • That’s $520 a year.
  • If you invest that consistently over 10 years at an average 8% return, you’ll have around $7,800.
  • Do that for 30 years? You’re looking at over $50,000—from just $10 a week.
  • And that doesn’t include what you might add once your income grows or expenses shrink.
  • Tiny habits, over time, lead to massive results.

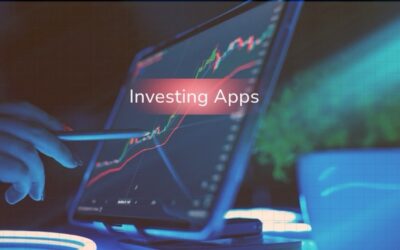
Step 1 – Picking the Right App

When I decided to finally invest, I needed an app that:

Allowed fractional shares (so I could invest in expensive stocks like Apple or Tesla without buying a whole share)

Had no trading fees

Made things easy for beginners

I landed on M1 Finance, but other great options include:

  1. Fidelity – Offers fractional shares and retirement accounts.
  2. Robinhood – Super simple, though best for taxable investing.
  3. Public – Has a social vibe and great for discovering stocks.
  4. Acorns – Rounds up your purchases and invests spare change automatically.

For me, M1 Finance stood out because I could build a “pie” of stocks and ETFs and automate my $10 deposits. More on that in a second.


Next Article To Read:  How I Overcame the Fear of Losing Money in Trading

Market vs Limit Orders — What I Learned the Hard Way

Market vs Limit Orders — What I Learned the Hard Way

When I placed my very first stock order, I didn’t know there were different types of orders. I just hit Buy, confirmed the price, and felt like I was officially a stock investor. I didn’t realize until later that I had placed a market order—and I definitely didn’t understand the risks involved.

Fast forward a few months, and I placed another market order during a highly volatile trading day. The result? I paid way more than I intended for a stock I wasn’t even that excited about. That was the moment I realized I needed to understand the difference between market vs limit orders—and fast.

If you’ve ever asked yourself, “What’s the difference between market and limit orders?” or you’re just trying to get a handle on market vs limit orders explained for beginners, this article is for you. I’ll break it all down with real-world examples, personal mistakes, and tips that will save you money (and stress).

What Is a Market Order?

Let’s start with the one most beginners (including me) use without even realizing it.

A Market Order Is the Fast Food of Trading

A market order means you’re buying (or selling) a stock at the best available price right now. You’re not setting any specific price target. You’re basically saying: Just give me the stock, whatever the current going rate is.

It’s fast. It’s easy. It’s like walking into a drive-thru and ordering the #1 combo. You’re not negotiating—you just want the food (or the shares) immediately.

When Market Orders Work Well:

  • The stock is highly liquid (like Apple or Microsoft).
  • You’re buying during normal market hours.
  • You’re not too concerned about paying a few extra cents per share.

My Rookie Mistake:
I placed a market order for a smaller, low-volume stock right after hours. The price I saw on my app was $17.80, but by the time my order filled, I ended up paying $18.45. That doesn’t sound like a big deal, but with a larger position? That slippage adds up—fast.

What Is a Limit Order?

Now for the smarter, more intentional sibling of the market order: the limit order.

A Limit Order = You Set the Rules

With a limit order, you set the maximum price you’re willing to pay to buy a stock—or the minimum price you’re willing to accept to sell it. If the market hits your target, the order executes. If not, it just sits there… waiting.

When Limit Orders Are Useful:

  • The stock is volatile or has large bid-ask spreads.
  • You want to control exactly what you pay or receive.
  • You’re not in a rush, and you’re okay waiting for the right price.

My First Smart Move:
After that overpriced market order debacle, I decided to try a limit order. I wanted to buy Starbucks (SBUX) at $92.50. The stock was hovering around $93, so I set a limit buy order at $92.50. A few hours later, the price dipped—and my order went through at exactly my price. Victory!

Market vs Limit Orders Explained for Beginners

Let’s break this down in the simplest way possible:

Feature Market Order Limit Order
Price Control You take the current market price You choose the price
Speed Very fast Might not execute right away
Good for Volatile Stocks? Risky due to price swings Safer, avoids surprise prices
Execution Guarantee Almost always fills  Only fills if price hits your limit
Beginner-Friendly? Simple to use More control, slight learning curve

Real-Life Examples That Helped Me Understand

Example 1 – Buying Apple with a Market Order

Let’s say Apple (AAPL) is trading at $150. You place a market buy order. Here’s what could happen:

  • Best case: Your order fills instantly at $150.01
  • Worse case: During high volatility, your order fills at $151.20—ouch

You get the shares either way, but not necessarily at the price you thought.

Example 2 – Buying Tesla with a Limit Order

  • Tesla (TSLA) is trading at $250. You only want to buy if it dips to $245. You place a limit buy order at $245.
  • If the price hits $245 (or lower), you get the shares.
  • If it never drops that low, the order just stays open (until you cancel or adjust it).
  • This is great if you’re patient and want a better deal.

How to Use Market and Limit Orders Like a Pro (Even as a Beginner)

1. Use Market Orders for Big, Liquid Stocks

Think Apple, Microsoft, or ETFs like VOO. These are super liquid, and the bid-ask spread is tight. A market order probably won’t cost you much extra—maybe a penny or two.

2. Use Limit Orders for Small or Volatile Stocks

If you’re trading lower-volume stocks (like small caps or penny stocks), or if there’s a big news event, go with a limit order. It protects you from overpaying during fast-moving markets.

3. Don’t Use Market Orders After Hours

Prices can be all over the place after normal trading hours. Limit orders are your best friend here. Otherwise, you might wake up to a what just happened kind of surprise.

4. Know the Timeframe of Your Limit Order

Most brokerages let you choose how long a limit order is active:

Day: It expires if not filled by market close

GTC (Good Till Canceled): It stays open until you cancel or it executes (sometimes up to 90 days)

What I Use Now (and What I’d Recommend)

Now that I’m a little more seasoned, here’s how I approach my trades:

  • Market orders: Only for large, stable ETFs or stocks—and only during market hours
  • Limit orders: For everything else, especially if I’m buying during dips or setting price targets

I also use limit sell orders when I want to lock in gains at a specific price. That way, I don’t have to watch the market like a hawk.

Final Thoughts: Learn From My Mistake (So You Don’t Repeat It)

When I started investing, I had no clue what “order types” even meant. I just hit “Buy” and hoped for the best. But once I learned the difference between market and limit orders, I felt way more in control.

If you’re just getting started and want market vs limit orders explained for beginners, remember:

  • Use market orders when speed matters and the stock is stable.
  • Use limit orders when price matters and you’re willing to wait.
  • Control is everything in investing—and order types give you just that. Take your time, place smart orders, and don’t be afraid to test small trades as you learn. You don’t need to be perfect—just intentional.
  • Now go place that next order like you actually know what you’re doing—because now, you do. ✅📈

Next Article To Read:  How I Started Investing With Just $10 a Week

How I Built My First Stock Portfolio

How I Built My First Stock Portfolio

When I first started investing, I felt like a kid in a candy store—except I had no idea what anything tasted like, how much it cost, or whether it would make me money or rot my financial teeth. There were thousands of stocks, endless expert opinions, and way too many acronyms. I didn’t want to blow my savings chasing the next big thing, but I also didn’t want to sit on the sidelines forever.

So, I kept it simple. I built my first stock portfolio using just three stocks. And honestly? That’s one of the best decisions I made.

If you’re wondering how to build a stock portfolio for beginners, here’s exactly how I did it—what I chose, why I chose it, and what I learned along the way.

Why I Didn’t Wait to “Know Everything” First

Like a lot of people, I thought I needed to be an expert before I started investing. I kept thinking:

  • “What if I pick the wrong stock?”
  • “Should I wait until I can afford a full share of Amazon?”
  • “Is this the right time to invest?”

Spoiler alert: there’s never a perfect time. And nobody knows which stock will go up or down tomorrow—not even the pros.

What I realized is that investing is more like learning a language or picking up an instrument. You learn best by doing, not by sitting on the sidelines reading charts all day.

So, I committed to starting small—just enough to build momentum and confidence.

Step 1 – Defining My Goals

Before I even opened my app, I asked myself a few questions:

Why am I investing?
Long-term wealth, not quick profits.

How much can I afford to invest?
I had about $200 to start.

How involved do I want to be?
I wanted something low-maintenance. No day trading, no stress.

My goal was to build a simple, long-term portfolio I could grow over time with small monthly contributions.

Step 2 – Choosing the Right Brokerage

There are tons of apps out there, but I went with M1 Finance because it allowed me to:

  • Invest fractional shares (perfect for my small budget)
  • Build a portfolio (they call it a “pie”)
  • Set up automatic contributions
  • It felt beginner-friendly, with just enough features to help me learn without overwhelming me.

Step 3 – Picking Just 3 Stocks (And Why That Was Enough)

Let’s get into the good stuff: what I actually bought.

Stock 1 – Vanguard S&P 500 ETF (VOO)

This wasn’t a single company—it was an ETF (exchange-traded fund) that tracks the top 500 companies in the U.S. Think Apple, Microsoft, Amazon, Google, Johnson & Johnson—all in one slice.

Why I picked it:

  • Instant diversification
  • Historically solid returns
  • Low fees
  • This became the foundation of my portfolio, making up about 50% of my initial investment.

Stock 2 – Apple (AAPL)

I use an iPhone, a MacBook, and AirPods. Apple products are practically glued to me. So I asked myself: Why not own a piece of the company I already spend money on?

Why I picked it:

  • Strong brand loyalty
  • Massive cash reserves and consistent growth
  • Pays a small dividend
  • It felt personal, and that helped me feel more connected to my investment.

Stock 3 – Realty Income (O)

This is a REIT (Real Estate Investment Trust) that owns commercial properties like Walgreens and 7-Eleven stores. The best part? They pay monthly dividends.

Why I picked it:

  • Monthly passive income (even if it’s tiny at first)
  • Real estate exposure without buying actual property
  • Historically stable and boring—in a good way
  • I wanted a mix of growth (Apple), stability (VOO), and cash flow (Realty Income). Three different types of companies, three different strengths.

Step 4 – Setting Up My Contributions

I didn’t stop at a one-time deposit. I knew the real magic of investing happens when you invest consistently over time.

So I set up automatic weekly contributions of $25, split across the three investments:

  1. 50% VOO
  2. 30% Apple
  3. 20% Realty Income

Every Friday, $25 goes into my pie—rain or shine, bull market or bear.

What I Learned From a 3-Stock Portfolio

1. Simplicity Beats Complexity

I didn’t need to own 20 different stocks to get started. In fact, by focusing on just three, I was able to learn what made them tick, track performance, and actually understand what I was invested in.

2. Diversification Can Start Small

Even with only three investments, I had exposure to hundreds of companies (thanks to VOO), the tech sector (through Apple), and real estate (through Realty Income).

It wasn’t perfect, but it was balanced enough for a beginner.

3. Small Amounts Add Up

The first few dividends I received were laughably tiny—like, $0.23. But that money was generated by money I didn’t work for. That tiny payment was proof that investing works. And those cents eventually became dollars.

What I’d Do Differently (Looking Back)

If I could go back, I might have:

  • Started sooner (the biggest regret of every investor ever)
  • Added a dividend ETF like SCHD for even more reliable income
  • Been less afraid of short-term market dips
  • But honestly? I’m proud of how I started. I kept it simple. I stayed consistent. And I actually enjoyed the process.

So, How Can You Build a Stock Portfolio as a Beginner?

Here’s a quick cheat sheet based on what worked for me:

1. Set a Budget You’re Comfortable With

Start with what you have—even if it’s just $20. The key is building the habit.

2. Choose 2–4 Stocks or ETFs

Mix it up with a broad ETF, one or two companies you believe in, and maybe a dividend stock for income.

3. Use an App That Supports Fractional Shares

Look for beginner-friendly platforms like:

  1. M1 Finance
  2. Fidelity
  3. Robinhood
  4. Public

4. Automate Your Contributions

Pick a weekly or monthly amount you can stick to. Even $10 a week is a solid start.

5. Stay Consistent and Learn as You Go

You’ll make mistakes, but you’ll also gain experience. Don’t panic when the market dips. Think long-term.

Final Thoughts: You Don’t Need 100 Stocks to Start Investing

  • I built my first portfolio with just three stocks—and that’s all I needed to feel like I had a piece of the game. I wasn’t chasing trends. I was building a foundation.
  • If you’re wondering how to build a stock portfolio for beginners, take it from me: start small, stay curious, and don’t wait for the “perfect time.” The best portfolio isn’t the fanciest one—it’s the one you actually build.
  • Your future self will thank you. 


Next Article To Read:  Market vs Limit Orders — What I Learned the Hard Way


Why Buy and Hold Made More Sense Than Day Trading

Why Buy and Hold Made More Sense Than Day Trading

When I decided to start investing, I had no idea where to begin. I’d heard the usual advice—make your money work for you, buy and hold, and invest for the long term—but it all sounded kind of vague. What I really needed was a beginner-friendly app that made stock investing feel less like rocket science and more like… ordering takeout. Thankfully, that app exists. In fact, several do.

So I did what any curious beginner would do: I downloaded a handful of popular investing apps, poked around, made small trades, and figured out which ones actually made sense for someone just starting out.

If you’re wondering what the best apps to invest in stocks for beginners are, here’s my honest review of the ones I tried—and which ones I stuck with.

What I Was Looking For as a Beginner

Before jumping into the list, here’s what mattered to me (and might matter to you, too):

  • Low or no fees (because I didn’t want my $50 investment getting eaten by commissions)
  • Fractional shares (so I could buy a piece of Apple without needing $200+)
  • Easy-to-use interface
  • Educational content or at least helpful explanations
  • Access to ETFs and stocks
  • Optional: retirement accounts and automatic investing tools
  • With that in mind, here’s what I found.

Robinhood – Easy Entry Into the Market

My First Investing App

Robinhood was the very first app I tried. It’s the go-to name that most beginners hear about, and for good reason—it’s super intuitive.

What I Liked

  • No trading fees, period.
  • Extremely user-friendly interface. I literally bought my first stock in under 3 minutes.
  • Fractional shares are available, so I could start with as little as $1.
  • Instant deposits (up to $1,000), so I didn’t have to wait for funds to clear.
  • Sleek, minimalistic app design.

What I Didn’t Love

  • Limited educational resources for beginners.
  • No access to mutual funds or retirement accounts.
  • Customer service used to be spotty (though it’s improved recently).

My Takeaway:
Robinhood is ideal if you want a simple and quick way to start buying stocks, especially with small amounts of money. It made investing feel approachable for me, which was exactly what I needed as a first-timer.

Fidelity – A Reliable, All-in-One Option

Stepping Into the Big Leagues (But Not Too Big)

After I got comfortable with the basics, I realized I wanted something more robust—something that offered retirement accounts, better customer support, and more investing tools. Enter: Fidelity.

What I Liked

  • No commissions on U.S. stocks and ETFs.
  • Offers Roth IRAs, traditional IRAs, and 401(k) rollovers.
  • Fractional shares with “Stocks by the Slice.”
  • Great customer support—I once called and spoke to a real human within 2 minutes.
  • Access to more in-depth research tools, if and when you’re ready for them.

What I Didn’t Love

  • Not as sleek or beginner-focused as some apps.
  • The dashboard can feel a bit overwhelming at first glance.

My Takeaway:
If you’re serious about building long-term wealth (think: Roth IRA + index funds), Fidelity is a rock-solid choice. I still use it for my retirement investing, and it’s become my financial home base.

M1 Finance – Great for Automated Investing

My Set It and Forget It App

Once I was more confident, I wanted to automate my investing. That’s when I tried M1 Finance—and I was blown away by the idea of creating “pies.”

What I Liked

  • Fractional shares, so you can build a diversified portfolio with small amounts.
  • You design your own “pie” (a portfolio), then set up automatic contributions.
  • No trading fees.
  • Offers both regular brokerage and retirement accounts.

What I Didn’t Love

Trades only happen once per day (morning window), so it’s not for active trading.

The pie interface is cool, but it took me a few days to fully understand how it works.

My Takeaway:
M1 Finance is perfect if you’re more interested in passive investing and automation than picking stocks every week. I use it to auto-invest in a mix of ETFs and dividend stocks every payday.

Public – Investing With a Social Twist

For the Social Learner

I downloaded Public after hearing that it combined investing with a social media vibe. I was skeptical—but also curious. Turns out, it’s actually kind of fun.

What I Liked

  • No commissions on stocks or ETFs.
  • Fractional shares available.
  • Transparent business model (no payment for order flow).
  • Social feed lets you see what others are buying and why (you can choose to keep your trades private, too).
  • Bite-sized educational content built into the app.

Next Article To Read:  How I Built My First Stock Portfolio (With Only 3 Stocks)

The Best Stock Investing Apps I Tried as a Beginner

The Best Stock Investing Apps I Tried as a Beginner

When I first decided to invest in stocks, I had no idea where to start. I thought I needed a fancy financial advisor or a suit and tie to get in the game. Thankfully, I quickly learned there’s an app for that—actually, lots of apps.

The problem? I didn’t know which ones were beginner-friendly or trustworthy. So I downloaded a bunch, tested them out, and slowly figured out what worked (and what didn’t). If you’re looking for the best apps to invest in stocks for beginners, here’s an honest breakdown of the ones I tried—and the ones I still use today.

What I Was Looking for in a Beginner App

Before we dive into the list, here’s what I personally looked for:

  • No account minimums
  • User-friendly interface (because I had zero clue what I was doing)
  • Fractional shares (so I could invest with small amounts)
  • No or low fees
  • Educational resources to help me learn as I go
  • Basically, I wanted something simple, safe, and supportive.

 1. Robinhood – Simple, Sleek, and Great for Starting Small

Why I Tried It:

Robinhood was the first investing app I ever used. It’s wildly popular, especially with beginners, because it strips away the intimidating stuff and makes investing feel easy.

 What I Liked:

  • Zero fees on trades
  • Clean, modern interface
  • Fractional shares (I started with just $20!)
  • Instant deposits of up to $1,000
  • It felt like the Instagram of investing apps. Very visual, very intuitive.

Downsides:

  • Limited research tools compared to more robust apps
  • No automatic dividend reinvestment (when I first started—it may have changed)
  • No access to mutual funds or retirement accounts

Best For:

Absolute beginners who want to buy their first stock or ETF with zero friction.

My Experience:
Robinhood gave me the confidence to actually place my first trade—a tiny slice of Microsoft. That single moment broke the ice for me and got me hooked on learning more.

 2. Fidelity – Old School Meets Beginner-Friendly

Why I Tried It:

Once I wanted more features—like a retirement account and better research—I looked into Fidelity. I was nervous at first (it sounded super “professional”), but I was pleasantly surprised.

What I Liked:

  • No commissions on U.S. stocks and ETFs
  • Fractional shares with “Stocks by the Slice”
  • Roth IRA and other retirement options
  • Solid customer service (I actually called once and got a real human)
  • Robust research tools if you want to dig deeper

Downsides:

Not as slick or modern as Robinhood

Slight learning curve with more advanced features

H3: Best For:
Beginners who are starting to take investing more seriously—or want to open a retirement account.

My Experience:
I opened a Roth IRA through Fidelity and started putting $100 a month into a low-cost index fund. The app felt grown-up in a good way, like I was leveling up financially.

H2: 3. M1 Finance – Best for Automation and “Lazy” Investing
H3: Why I Tried It:
After a few months of learning the ropes, I wanted to automate my investing. That’s where M1 Finance came in. It’s like a mix of investing + budgeting + set-it-and-forget-it.

H3: What I Liked:

  • Create “Pies” of stocks/ETFs and automate contributions
  • Fractional shares down to the penny
  • No fees or trading commissions
  • Great for dollar-cost averaging
  • You can build a portfolio with slices like 40% VOO, 30% Apple, 15% Microsoft, and 15% SCHD—then automate deposits weekly or monthly.

Downsides:

No real-time trading (they do trades in batches once per day)

Less ideal for active traders or people who like to buy/sell quickly

 Best For:

Beginners who want to build a diversified portfolio and automate everything.

My Experience:

I set up a pie with ETFs and dividend stocks and automated $50 a week into it. It felt amazing to invest without having to think about it—and watch my portfolio grow passively.

4. Public – Investing Meets Social Media

Why I Tried It:

I saw a lot of buzz about Public, especially among new investors who like learning socially. It’s kind of like if Twitter and a brokerage app had a baby.

 What I Liked:

  • Zero commissions
  • Clean, beginner-friendly design
  • Social feed where you can see what others are investing in (optional)
  • Transparency: shows you how the company makes money

Downsides:

Limited to taxable brokerage accounts (no IRA options)

Less educational depth compared to Fidelity or Schwab

Best For:

People who like a community-based approach to learning and want a simple, modern experience.

My Experience:

I followed a few other investors on the app, got inspired by what they were doing, and learned new ETF ideas. It’s a great “gateway” app if you’re still exploring the basics.

 5. SoFi Invest – A Clean, All-in-One Finance App

Why I Tried It:

I already had a SoFi student loan account, so I figured—why not check out their investing features too?

 What I Liked:

  • Beginner-friendly interface
  • Offers automated investing (robo-advisor) and DIY trading
  • Free financial planning tools and access to advisors
  • Good integration if you already use SoFi for banking or loans

 Downsides:

Not as in-depth for research or advanced investing

Smaller selection of assets compared to bigger platforms

Best For:

SoFi users or people who want everything in one app—banking, loans, and investing.

My Experience:

I tried their automated portfolio for fun and let it ride for a few months. It was hands-off and smooth, but I ended up moving to Fidelity for more customization.

Final Thoughts – Which App Should You Choose?

If you’re brand new and want a quick start, go with Robinhood or Public.
If you’re ready to automate and build a portfolio, try M1 Finance.
If you want long-term tools, retirement accounts, and great service, Fidelity is a strong choice.
If you’re already a SoFi user and want convenience, SoFi Invest makes sense.

 My Current Setup:

  • M1 Finance for my automated investing
  • Fidelity for my Roth IRA and long-term holdings
  • Robinhood (still open) for occasional experimenting
  • No one app does everything perfectly. The best app is the one that fits your goals, your style, and your level of comfort.

Start Small, Learn as You Go

  • Don’t let “analysis paralysis” keep you from starting. I tried five apps before I found my rhythm. The key is to start with small amounts, stay consistent, and grow over time.
  • The sooner you start, the more time your money has to grow. Choose the app that feels right, hit that “Buy” button on your first stock or ETF, and pat yourself on the back—you’re officially an investor.
  • Got $10 and a smartphone? You’re ready.
    Welcome to the club. 


Next Article To Read:  Why Buy and Hold Made More Sense Than Day Trading (For Me)


5 Stock Market Myths I Believed — Until I Started Investing

5 Stock Market Myths I Believed — Until I Started Investing

When I first thought about investing, I pictured Wall Street suits shouting into phones, complicated charts, and people either striking it rich or losing everything. Basically, I thought the stock market was a high-stakes casino that only the wealthy and well-connected understood.

Turns out, a lot of what I believed was totally wrong. Like many people just starting out, I fell for some of the most common stock market myths for beginners—myths that kept me from investing sooner.

So here are 5 myths I personally believed (and debunked) after I actually started investing.

1: You Need a Lot of Money to Start Investing

What I Thought:

I assumed I needed thousands of dollars just to enter the market. I thought investing was something you do after you’ve paid off all your debt, built a six-month emergency fund, and inherited some cash from a distant relative.

What I Learned:

  • You can literally start investing with $5.
  • Thanks to modern brokerages like Robinhood, Fidelity, and M1 Finance, you can buy fractional shares of companies. That means if a stock costs $500 per share, you can buy just $5 or $10 worth of it.

My Story:
I opened my first investment account with $50 and bought a small piece of VTI, a total stock market ETF. It wasn’t much, but it was enough to get started and start earning dividends. That one small step helped me build the habit—and confidence—to keep going.

2: Investing Is Basically Gambling

What I Thought:

I used to think investing was like betting on red or black in Vegas. You win some, you lose some, right?

What I Learned:

  • Investing is not gambling—if you do it wisely. Gambling is based on chance. Investing is based on ownership in real companies that produce goods, offer services, and generate profits.
  • Yes, stocks go up and down in the short term. But over time, the stock market has consistently trended upward—because companies grow, innovate, and expand.

My Story:

Once I started researching companies like Microsoft and Johnson & Johnson, I realized I wasn’t betting on random movements. I was choosing to own parts of real businesses that had been growing for decades. Suddenly, it didn’t feel like gambling—it felt like planting seeds.

3: You Have to Pick the Perfect Stock

What I Thought:

I thought there was one magic stock out there that would “make me rich”—and if I picked the wrong one, I’d fail. So I kept waiting… and waiting… never investing, because I was afraid of getting it wrong.

What I Learned:

  • There is no perfect stock. Even the best investors pick losers sometimes. The key is diversification and consistency—not perfection.
  • You can invest in ETFs (exchange-traded funds) that hold hundreds of companies at once. That way, you’re not putting all your eggs in one basket.

My Story:

  • I stopped trying to find the next Tesla and bought a mix of ETFs and a few stable dividend stocks. Some did great, others were “meh”—but overall, I grew my portfolio steadily.
  • The real game-changer? I realized time in the market > timing the market.

4: The Market Is Too Risky—You’ll Lose All Your Money

What I Thought:

Every time I saw a market crash on the news (like in 2008 or during COVID-19), I assumed people lost everything. That terrified me. Why would I put my hard-earned money into something that could disappear overnight?

What I Learned:

  • Yes, the market has short-term volatility—but if you stay in long enough, the odds are in your favor. Historically, the U.S. stock market has recovered from every crash and continued growing.
  • If you invest in diversified funds and leave your money in for 5–10+ years, you’re far less likely to lose—and more likely to see gains.

My Story:
In my first year of investing, my portfolio dipped by 8%. I panicked a little—but I didn’t sell. A few months later, it bounced back. Now, I understand dips are normal, and they’re actually opportunities to buy more at a discount.

5: You Have to Know a Lot About Finance to Invest

What I Thought:

I imagined that successful investors had MBAs or worked in finance. Since I couldn’t understand half the lingo in financial articles, I figured I had no business investing.

What I Learned:
You don’t need to be a finance pro. You just need basic knowledge, the right tools, and a plan.

Start by learning simple concepts like:

  • What a stock or ETF is
  • The power of compound interest
  • How diversification works
  • Why time matters more than timing
  • Plenty of YouTube videos, blogs, and beginner-friendly books (like The Simple Path to Wealth or The Psychology of Money) can help you build confidence.

My Story:
I started by watching a few beginner investing videos and reading Reddit threads. Once I understood the basics, the fear faded. I didn’t need to understand every detail—just enough to make good, consistent decisions.

 Bonus Myth – You’re Too Young (or Too Old) to Start Investing

People often think they’re either too young (“I don’t have enough money yet”) or too old (“it’s too late for me to grow wealth”).

Here’s the truth:

  • If you’re young, time is your superpower. Even small amounts can grow massively over decades.
  • If you’re older, it’s still not too late. You can still benefit from dividends, compound growth, and better financial habits.

My Story:
I started in my late 20s and immediately thought, “I should’ve started at 18.” But I also knew people who started in their 40s and made amazing progress by being focused and intentional.

Final Thoughts: Don’t Let Myths Hold You Back

I wasted years on the sidelines because I believed these common stock market myths for beginners. Once I started investing—slowly, with small amounts—I realized the market wasn’t some terrifying beast. It was a tool. A powerful one.

So if you’ve been holding back because of these myths, let me say this:

  • You don’t need a lot of money.
  • You don’t need to pick the perfect stock.
  • You don’t need to be a finance expert.
  • You just need to start—and let time, consistency, and learning do the rest.
  • Your future self will be glad you didn’t wait.

Next Article To Read:  The Best Stock Investing Apps I Tried as a Beginner


Should You Buy ETFs or Individual Stocks First?

Should You Buy ETFs or Individual Stocks First?

When I first decided to start investing, I was staring at my brokerage app like it was a foreign language exam. There were ETFs, individual stocks, index funds, options, REITs—I didn’t even know what half those acronyms meant. But the first major fork in the road was this: ETFs vs individual stocks for beginners. Which one should I start with?

Spoiler: I started with both—but not at the same time. Let me walk you through what I learned, how I made my decision, and what I wish I knew sooner.

What’s the Difference Between ETFs and Individual Stocks?

Before we jump into which one is better to start with, let’s break down what these two things actually are.

 Individual Stocks

Buying a stock means you’re buying a piece of one specific company. If you buy a share of Apple (AAPL), you own part of Apple. Your success is directly tied to how Apple performs—if the stock price goes up, you win. If it tanks, well… you learn a hard lesson.

ETFs (Exchange-Traded Funds)

ETFs are like baskets of stocks. When you buy an ETF, you’re buying a small slice of a whole bunch of companies—sometimes hundreds. For example:

  • VTI = A slice of the entire U.S. stock market
  • VOO = S&P 500 (the top 500 U.S. companies)
  • VYM = High-dividend stocks

Think of ETFs like buying a whole pizza with different toppings. Buying a stock is like picking just one slice.

My First Investment (And Why I Chose an ETF)

When I had my first $100 to invest, I didn’t want to bet it all on one company. I was nervous. What if I picked the wrong stock? So I started with VTI—a total market ETF. That way, I was investing in over 4,000 companies at once. Even if a few companies in the fund had a bad year, I’d still be okay because the rest would balance it out.

I felt like I had a financial safety net. Plus, it meant I could start investing without having to become a stock-picking expert overnight.

ETFs vs Individual Stocks for Beginners: The Key Differences
Let’s break this down in a beginner-friendly way.

Feature ETFs Individual Stocks
Diversification Built-in (many companies) One company only
Risk Level Lower Higher
Research Needed Minimal Moderate to High
Potential Upside Steady and long-term Can be high, but risky
Hands-On Needed Very little Needs monitoring
Good for Beginners? Yes Depends on your approach

Why Beginners Might Want to Start With ETFs

 1. Built-In Diversification

With a single ETF, you’re spreading your money across many companies. That way, if one company tanks, you’re not wiped out.

I liked the idea of not putting all my eggs in one basket—especially because I had no idea how to read a balance sheet or earnings report at the time.

 2. Less Stress = Less Guesswork

ETFs are “set it and forget it” friendly. You don’t have to track earnings calls or watch for sudden price swings. That made it easier for me to focus on learning without freaking out over every little stock dip.

3. You Still Get Growth

Just because ETFs are safer doesn’t mean they’re boring. Some ETFs, like those tracking the S&P 500 (like VOO), have returned around 10% annually over the long run.

When It Makes Sense to Try Individual Stocks

After a few months of investing in ETFs, I felt more confident and wanted to dive deeper. That’s when I started researching and buying individual stocks. Here’s what I realized:

1. You Can Learn a Ton

Picking individual stocks forced me to really understand a business—how it makes money, what risks it faces, and how it competes. I treated it like a research project (and actually enjoyed it).

 2. The Upside Can Be Bigger

If you’d invested in Amazon or Apple early on, your returns would’ve destroyed any ETF. Of course, hindsight is 20/20, and I wasn’t trying to hit a home run on day one. But for someone who loves learning about companies, individual stocks can be more exciting.

 3. You Can Invest in What You Believe In

I picked Microsoft as one of my first stocks because I believed in their long-term growth. I used their products every day, and they seemed like a solid bet. Owning the stock made me feel more connected to the brand—and more motivated to follow business news.

 So… ETFs or Individual Stocks First?

If You’re Brand New and Want to Keep It Simple:
Go with ETFs.
Start with something like VTI, VOO, or SCHD. You’ll get diversified exposure, lower risk, and peace of mind. It’s like putting your investments on autopilot.

If You’re Curious and Willing to Learn:
Start with an ETF and one individual stock.
That’s what I did. I used ETFs as my “core,” and experimented with small positions in individual stocks. It let me learn without betting the farm.

Common Mistakes to Avoid (Yes, I Made Some)

1. Chasing Meme Stocks

I got swept up in the GameStop and AMC craze for a hot minute. It was fun, but I lost money and learned quickly that hype ≠ smart investing.

2. Going All In on One Stock

One of my coworkers put all his early investment into Tesla. It worked out for him—but it could’ve just as easily gone the other way. Diversify. Always.

3. Ignoring Fees and Expense Ratios

Some ETFs charge higher fees than others. For beginners, stick with low-cost index ETFs from providers like Vanguard or Schwab.

 Final Thoughts – Build a Mix That Fits You

The beauty of investing today is you don’t have to choose one or the other. With fractional shares and no-fee brokerages, you can build a portfolio that includes both ETFs and individual stocks—even with just $100.

If I were starting over today, here’s what I’d do:

Put 80–90% of my money in broad market ETFs (like VTI or SCHD)

Use the remaining 10–20% to slowly experiment with companies I believe in

Keep learning as I go

At the end of the day, the best investment strategy is one you actually stick with. So whether you start with ETFs or dip into individual stocks, just make sure you start. The earlier you begin, the more time your money has to grow—and that’s the real win.

Got $50? $100? Start there. You don’t need to know everything—just enough to make one good decision. Then build on it. That’s exactly how I did it.

Do you like this personality?

Next Article To Read:  5 Stock Market Myths I Believed — Until I Started Investing


How I Picked My First Stock

How I Picked My First Stock

When I first got interested in the stock market, I felt completely overwhelmed. Everyone was talking about charts, candlesticks, P/E ratios, and earnings reports. I thought I had to become some kind of financial wizard to make a good decision. But here’s the truth: you don’t need a finance degree to learn how to pick stocks as a beginner.

In this article, I’ll walk you through how I picked my first stock without just throwing a dart at a list—and how you can do it too.

Why I Didn’t Want to Guess

Let’s face it—guessing is gambling. And I wasn’t trying to gamble. I wanted to invest—to grow my money, not lose it chasing hype.

I had watched a friend pour a few hundred bucks into a stock because “everyone on Reddit was talking about it.” A few weeks later, the hype died and so did his investment. That was the moment I decided: no guessing, no chasing trends.

Step 1 – Learning the Basics (Without Drowning)

Before even looking at a single stock, I knew I had to understand what I was buying.

What is a stock, really?

A stock is simply a slice of ownership in a company. When you buy a share, you own a piece of that business. So instead of thinking of it as a ticker symbol, I started asking:

  • Do I believe in this company?
  • Would I want to own a part of this business?
  • That shift in mindset helped me filter out a lot of noise.

H3: Resources I Used

I didn’t dive into 500-page textbooks. Instead, I kept it simple:

  • YouTube – Graham Stephan and Andrei Jikh had super beginner-friendly videos.
  • Books – The Little Book of Common Sense Investing by John Bogle gave me a solid foundation.
  • Apps – I used Yahoo Finance and Seeking Alpha to track companies.

Step 2 – Picking an Industry I Actually Understand

I decided my first stock should come from an industry I knew and cared about. For me, that was tech and consumer goods—stuff I used every day. I wasn’t going to invest in oil companies or pharmaceutical giants when I didn’t even understand how they made money.

I made a list of companies I interacted with often:

  1. Apple (used my iPhone daily)
  2. Starbucks (guilty of a $5 coffee habit)
  3. Nike (my go-to shoes)
  4. Microsoft (used it for work)

Starting here helped me feel connected to the companies I was researching.

Step 3 – Looking at the Business, Not Just the Stock

Here’s where the real turning point happened for me. I started thinking like a business owner, not a trader.

What I Asked About Each Company

Do they make money consistently?
I checked their earnings. Were profits growing year over year?

Do they have a competitive advantage?

For example, Apple has brand loyalty and an ecosystem that keeps people locked in.

Are they in debt?
A bit is fine, but I didn’t want to invest in a company drowning in IOUs.

Are people still going to want this in 10 years?
Starbucks coffee isn’t going out of style any time soon.

I used free resources like Yahoo Finance’s “Statistics” and “Financials” tabs to peek at revenue, net income, and debt.

Step 4 – Comparing a Few Good Options

By this point, I had narrowed my list to:

  • Apple (AAPL)
  • Starbucks (SBUX)
  • Microsoft (MSFT)

All three were strong, but I had to choose just one. So I compared:

Company Dividend? Revenue Growth Brand Strength
Apple Yes High Very Strong
Starbucks Yes Moderate Strong
Microsoft Yes High Very Strong

Why I Picked Microsoft

Steady revenue and profit growth
It wasn’t flashy, but it was solid.

Diversified business model
Cloud computing (Azure), software (Office), and gaming (Xbox) = multiple streams of income.

Strong moat
Hard to imagine a world without Microsoft products.

Plus, they paid a small dividend, which meant I’d earn a little income just for holding the stock.

Step 5 – Starting Small and Hitting Buy

I had about $100 to start. Thanks to fractional shares, I didn’t need to buy a whole share of Microsoft (which was over $200 at the time). I bought about $50 worth—and that was it.

How It Felt to Own My First Stock

Honestly? Empowering.

I checked my portfolio every day at first. (I’ve since stopped doing that.) But seeing even a few cents in growth—or that first tiny dividend—was so motivating. I felt like I’d finally taken the first step toward building wealth.

Tips on How to Pick Stocks as a Beginner

If you’re still wondering how to pick stocks as a beginner, here are my best takeaways:

1. Buy What You Know

If you understand how a company makes money, you’re less likely to panic when things get bumpy.

2. Research the Business, Not the Hype

Forget what’s trending on social media. Dig into revenue, earnings, and what makes the company unique.

3. Start With a Watchlist

Track a few companies before buying. Get familiar with their ups and downs.

4. Use Fractional Shares to Start Small

You don’t need hundreds of dollars. Invest $20 in a company you believe in and learn as you go.

5. Don’t Just Copy Others—Learn Why They Picked It

Everyone has different risk tolerance, goals, and timelines. What works for one person may not work for you.

Final Thoughts: You Don’t Need to Be an Expert to Start

  • Picking my first stock wasn’t about making the perfect choice—it was about making a smart one. I didn’t rely on hot tips or guesswork. I asked questions, did a little research, and chose a company I truly believed in.
  • If you’re just starting and wondering how to pick stocks as a beginner, trust me—start with curiosity, not fear. You’re not trying to pick the best stock ever. You’re just trying to take your first step into investing wisely.
  • So go ahead—build that watchlist, do a little digging, and make your move. Future you will thank you.


Next Article To Read:  Should You Buy ETFs or Individual Stocks First?


How I Started Earning Dividends With Just $50

How I Started Earning Dividends With Just $50

When I first dipped my toes into the stock market, I had exactly $50 to invest—and zero experience. I wasn’t trying to get rich overnight. I just wanted to start somewhere. If you’re wondering how to earn dividends from stocks as a beginner, let me walk you through my journey and share the steps (and mistakes!) I made along the way.

What Are Dividends, Anyway?

Before I even began investing, I had to learn what dividends actually were. In plain English, dividends are small payments some companies make to shareholders, usually every quarter. They’re like a “thank you” from a business for holding their stock.

Let’s say you own a share of a company that pays a $0.50 dividend every three months. That’s $2 a year for just owning the stock. It doesn’t sound like much—but it can add up fast if you reinvest those dividends and grow your portfolio over time.

Why I Chose Dividends Over Day Trading

Like many beginners, I was tempted by the idea of day trading—buying and selling stocks quickly to turn a profit. But honestly, it was overwhelming. I wanted something more passive. Something that didn’t require me to stare at charts all day.

That’s when I stumbled upon dividend investing. The appeal? You can invest in stable companies, collect cash payments over time, and potentially grow your investment. Plus, with fractional shares and no-fee brokerages today, you don’t need a lot of money to get started.

Step 1:Picking a Broker That Allowed Small Investments

Since I only had $50, I needed a platform that let me:

  • Buy fractional shares
  • Avoid account minimums
  • Skip trading fees
  • I ended up going with Robinhood at the time (though there are plenty of other great options now like Fidelity, M1 Finance, and Public). The important part was that I could invest small amounts without getting dinged by fees.

Step 2: Learning How to Spot Good Dividend Stocks

I quickly learned not all dividend stocks are created equal. Some offer high yields but aren’t sustainable (these are called “dividend traps”). Others have a long history of consistent payouts.

Here’s what I looked for:

  • Dividend yield around 2%–5% (higher isn’t always better)
  • Payout ratio under 70% (this tells you the company isn’t overextending)
  • A history of dividend increases (like Dividend Aristocrats)

My First Pick: Realty Income (O)

One of my first purchases was Realty Income, often nicknamed “The Monthly Dividend Company.” It’s a real estate investment trust (REIT) that pays a small dividend every month. With my $50, I was able to buy a fractional share and started seeing payments the very next month.

Getting that first $0.19 deposit hit differently. It felt like my money was doing something while I slept.

Step 3: Reinvesting Dividends (a.k.a. DRIP)

I didn’t cash out my dividends—I used something called DRIP (Dividend Reinvestment Plan). It automatically uses any dividend you earn to buy more shares of the same stock.

It might only buy you a few cents’ worth of stock, but those cents compound over time. It’s like snowballing your investments.

Step 4: Staying Consistent With Small Contributions

After that first $50, I started tossing in $20 or $30 a month. Sometimes more, sometimes less—depending on my budget. The key was consistency. I wasn’t trying to beat the market. I was just trying to build habits and grow my portfolio over time.

What My Portfolio Looks Like Now (2 Years Later)
Fast-forward two years, and here’s a snapshot of my portfolio:

  • Value: ~$2,800
  • Dividend income (annualized): ~$95/year
  • Holdings: Realty Income (O), Johnson & Johnson (JNJ), Procter & Gamble (PG), and a few ETFs like VYM

$95 a year may not sound like much—but that’s almost $8/month for doing nothing. I like to think of it as my “coffee fund” that’s slowly turning into a “grocery fund.”

Tips for Earning Dividends From Stocks as a Beginner

If you’re wondering how to earn dividends from stocks as a beginner, here are the exact tips I wish someone had told me:

1. Start With What You Have

Don’t wait until you have thousands saved up. With platforms that support fractional shares, $10 or $50 is enough to begin.

 2. Focus on Dividend Growth, Not Just Yield

A company with a lower dividend yield but a consistent track record of increasing payouts can outperform a high-yield stock that eventually cuts its dividend.

3. Use DRIP to Reinvest Automatically

The easiest way to build your dividend snowball is to turn on automatic reinvestment. Most brokerages support this now with just a click.

4. Consider Low-Cost Dividend ETFs

If picking individual stocks seems too intimidating, consider dividend-focused ETFs like:

  • Vanguard High Dividend Yield ETF (VYM)
  • Schwab U.S. Dividend Equity ETF (SCHD)
  • SPDR S&P Dividend ETF (SDY)

These give you instant diversification and steady payouts.

 5. Track Your Income for Motivation

Every time I get a dividend, I log it in a spreadsheet. Seeing those numbers climb—even slowly—is incredibly motivating.

The Magic of Compounding and Time

The real magic of dividends isn’t in the $0.19 you earn today—it’s what that $0.19 can grow into over 5, 10, or 20 years. When you reinvest and stay consistent, your money begins to multiply itself.

I like to say: “Your dollars become little employees that go to work for you.”

Final Thoughts: Just Start

When I started with $50, I didn’t know what I was doing. I just knew I wanted to learn and take control of my finances. Today, I feel a little more confident, and a lot more patient.

If you’re still on the fence about how to earn dividends from stocks as a beginner, the best advice I can give is this:

Start small. Stay consistent. Learn as you go.

Dividends may not make you rich overnight, but they will help you build wealth steadily over time.

Happy investing! And if you have any questions, I’m happy to share more. Just don’t ask me about meme stocks—I’m still recovering from that AMC experiment. 

Next Article To Read:  How I Picked My First Stock


How I Learned to Trade Forex Around Big News Events

How I Learned to Trade Forex Around Big News Events

If you’ve been in the forex game for a while, you’ve probably noticed that big news events can shake up the markets in a heartbeat. Whether it’s an interest rate decision, an economic report, or geopolitical news, these events can send currency prices soaring or crashing.

  • When I first started trading forex, I made the classic mistake of ignoring news events. I assumed that all I needed to do was follow my strategy and let the charts do the talking. But quickly, I learned that news events are impossible to ignore, especially if you want to trade profitably.
  • In this article, I’m going to share how I learned how to trade forex news events effectively, and how you can use this powerful tool to enhance your trading.

Why Trading Forex Around News Events Can Be So Profitable (or Risky)

Before we dive into how I learned to trade the news, let’s first explore why trading around news events can be both lucrative and dangerous.

The Impact of News on Currency Prices
News events cause big market moves because they affect trader sentiment. For example:

  • Interest rate decisions from central banks can cause massive volatility.
  • GDP reports and employment data show the economic health of a country, which directly impacts its currency’s strength.
  • Geopolitical events, like wars or elections, can shake investor confidence in a nation’s economy.

I remember my first experience with a major news event — a U.S. Federal Reserve rate hike. I was trading EUR/USD, and everything was going fine, until suddenly, the market whipped against me and hit my stop-loss in seconds. It took me a while to understand that the Fed’s decision had completely overshadowed my technical analysis.

But it wasn’t just about making a profit or taking a loss — it was about understanding that news mattered. In short, the right news event at the right time can trigger swift, large moves that provide excellent profit opportunities. But if you’re not prepared, it can also quickly wipe out your trades.

My First Attempt: Blindly Trading Through News Events

  1. At the start, I didn’t pay much attention to the news. I figured, “The charts will tell me what to do.” But then came the day the Non-Farm Payroll (NFP) report was released in the U.S. — and my entire trading account almost vanished in a blink.
  2. The NFP is a huge indicator of U.S. employment health, and it moves the market significantly. I had a few open trades and didn’t know the report was due to be released that morning. As soon as the data came out, I watched my account balance plummet as the market swung dramatically in the other direction.
  3. That was my wake-up call. I realized that trading forex news events wasn’t something I could ignore. I needed a game plan to incorporate the news into my strategy — and this is how I figured it out.

How I Learned to Trade Forex Around News Events

Step 1: Stay Informed

The first step in learning how to trade forex news events is to stay informed. You need to know when important economic reports or geopolitical events are coming up, and you need to be aware of their potential impact on the market.

I began checking the economic calendar every day, marking down any upcoming events that could affect the markets. Some key things I started paying attention to were:

  • Central bank meetings and interest rate decisions (e.g., the Fed, ECB, BOE, etc.)
  • Economic indicators like CPI (Consumer Price Index), GDP (Gross Domestic Product), and PMI (Purchasing Managers’ Index).
  • Geopolitical events like elections, trade talks, or global tensions that might impact risk sentiment.
  • At first, I just glanced at the calendar, but eventually, I learned to take notes and plan around these events. Once I got into the habit, it was much easier to prepare for the impact of news.

Step 2: Understand the Market’s Expectations

  • It’s not enough to just know when the news is coming. You need to understand the market’s expectations. In forex, it’s not always the news itself that causes the big moves — it’s the difference between what was expected and what actually happens.
  • For example, let’s say the market expects the U.S. to announce a 0.25% interest rate hike. If the Federal Reserve delivers a 0.50% rate hike, the market will likely react very strongly, pushing the U.S. dollar higher.
  • On the flip side, if the Fed only raises rates by 0.10%, traders might be disappointed, and the dollar could drop.

Here’s how I learned to gauge expectations:

  • Look at forecasts: I’d check the consensus forecast for key economic reports. Websites like Forex Factory or Investing.com provide consensus estimates.
  • Listen to analysts: Some trading platforms offer analyst commentary or market sentiment indicators that can help you gauge whether the market is overly optimistic or pessimistic.
  • Compare past data: Looking at previous reports and how the market reacted can give me a clue about potential reactions.

Step 3: Prepare for Volatility with a Plan

One of the most important things I learned about how to trade forex news events is that you need to prepare for extreme volatility — because that’s exactly what you get when a big news event hits. Without a solid plan in place, emotions can take over, and you could end up making impulsive decisions.

I developed the following strategies to prepare for volatility:

A. Set Your Stops and Targets

  • Before trading around big news events, I always set a stop-loss to manage risk, as price can move quickly in either direction. I also set a take-profit target to lock in profits if the move goes in my favor.
  • However, during volatile periods, I also adjusted the size of my trades. I would risk less than usual around major events to account for the increased uncertainty. For example, I might risk 1% of my account on a normal trade but scale it back to 0.5% around major news.

B. Don’t Trade the News Itself

  • Initially, I thought that jumping into a trade right after the news came out was the way to go. But I quickly learned that the market could move unpredictably right after the data is released, so I shifted my approach. Now, I prefer to wait for the dust to settle after the initial reaction.
  • By waiting 15-30 minutes after the news release, I can better assess the market’s true direction and look for better entry points. Sometimes, the first few moves are nothing more than “noise.”

Step 4: Watch the Aftermath

  • I now realize that the real opportunities sometimes come after the dust settles. After the initial reaction, the market tends to take a breath, and trends become clearer. That’s when I step in with a more calculated entry.
  • Let’s say a central bank announces a rate hike, and the currency spikes up. I wait for the pullback and look for a confirmation signal (like a retest of a key level or a candlestick pattern) before entering a trade.
  • This tactic helped me avoid getting caught in “false breakouts” or “whipsaws.”

Tips for Trading Forex Around News Events

  • Avoid trading during extreme news volatility unless you have a proven strategy and tight risk management.
  • Trade in the direction of the trend, but be mindful that trends can reverse after major news events.
  • Don’t over-leverage your positions — increased volatility can lead to greater risk.
  • Practice on a demo account: I spent several months backtesting my strategies around news events to improve my execution.

Final Thoughts: Embrace News, but With Caution

  • Learning how to trade forex news events was a game-changer for me. I went from taking wild risks to building a strategy around big announcements — and my profits started to reflect that. But, as I learned, it’s not about blindly following the news. It’s about preparing, understanding expectations, and having the discipline to wait for the right moments.
  • Trading forex around big news events is like walking a tightrope. With the right preparation and a clear plan, you can capitalize on volatility — but if you jump in without a strategy, you might just fall.
  • So, take it slow, stay informed, and remember: you don’t need to trade every piece of news — just the ones that fit your plan.


Next Article To Read:  ix trader show experience


The Simple Forex Strategy That Actually Worked for Me

The Simple Forex Strategy That Actually Worked for Me

When I first dipped my toes into the world of forex trading, I was overwhelmed by the complexity of it all. There seemed to be endless strategies, indicators, and advanced concepts flying around, each promising to lead me to financial success. I tried a few of them, and honestly? I ended up confused and broke after a while. But then, I stumbled upon a simple forex strategy for beginners that actually worked for me—and I’m here to share it with you.

It wasn’t anything flashy, no secret “golden” indicator or complex formula. In fact, it was a stripped-down, no-nonsense approach that helped me stay grounded, make steady profits, and avoid some of the common mistakes new traders make.

So, if you’re a beginner looking to dive into forex trading without getting lost in all the noise, keep reading. This strategy can help simplify things for you, and more importantly, actually work.

Why Simplicity Matters in Forex Trading

Let’s face it: when you’re just starting out, the world of forex can feel like a complicated maze. You’ve got candlestick patterns, moving averages, RSI indicators, and a host of other technical analysis tools to navigate. Add to that the overwhelming amount of advice from seasoned traders, and it’s easy to feel like you’re in over your head.

That’s where simplicity becomes your best friend.

When I first started, I thought I needed all these fancy tools to make profitable trades. But over time, I realized that the best strategy doesn’t have to be complicated—it just has to make sense and be consistent.

The strategy I’m going to share with you is simple, straightforward, and—most importantly—effective for beginners. So, let’s get into it.

The Strategy I Use: The 3-Step Simple Forex Approach

This strategy is based on a few key principles that I’ve come to rely on as a beginner trader. It focuses on price action (which is just a fancy way of saying “what the market is doing right now”) and uses support and resistance levels to determine entry and exit points. Here’s the breakdown:

Step 1: Identify the Trend

The first thing I do when I open a chart is identify the trend. I don’t try to predict whether the price is going to go up or down in the next 10 minutes—I look at the bigger picture.

My Experience with Trends

  • I used to think I could “beat the market” by picking the tops and bottoms of price movements. Guess what? That didn’t work. I learned the hard way that trading with the trend is far more reliable. By identifying the overall direction of the market, I can increase my chances of success. Whether the market is trending up (bullish) or down (bearish), trading with the trend significantly reduces my risk.
  • To identify the trend, I use a simple approach: I look for higher highs and higher lows in an uptrend or lower highs and lower lows in a downtrend. This is a visual cue that helps me stay aligned with the market’s momentum.

Step 2: Locate Key Support and Resistance Levels

Once I have identified the trend, the next thing I do is look for support and resistance levels. These are price levels where the market tends to reverse or consolidate.

What Is Support and Resistance?

  • Support is a price level where the market has historically bounced upward. Think of it as the “floor” for the price.
  • Resistance is the opposite—it’s a price level where the market has repeatedly faced downward pressure. You can think of this as the “ceiling.”
  • I look for areas where the price has previously bounced off of, whether it’s a clear support level in an uptrend or a resistance level in a downtrend. These levels act as barriers where the market could potentially reverse.

Why Support and Resistance Are Key

  • In my early days of trading, I’d jump into trades based on random entries, hoping for the best. I quickly realized that support and resistance are like the market’s way of telling you where it might make a move. These levels offer great opportunities for entry and exit points.
  • I also started using horizontal lines to mark support and resistance areas on the chart. These visual markers made it easier for me to spot potential trade setups and avoid blindly entering the market.

Step 3: Enter the Market at the Right Time

The last part of my strategy is waiting for confirmation to enter the market at the right time. I no longer just jump into trades when I see a nice support or resistance level. Now, I wait for the price to show signs of respecting those levels before I pull the trigger.

How I Wait for Confirmation
I often look for candlestick patterns to confirm that the price is indeed bouncing off a key level. Some patterns I use are:

Bullish engulfing: When a small red candle is followed by a larger green candle, indicating buying pressure.

Hammer: A candlestick with a small body and long lower wick, signaling a potential reversal from a support level.

Doji: A candlestick that indicates indecision, often near support or resistance levels.

Once I see one of these patterns near a support or resistance level, I feel confident to enter the trade in the direction of the trend.

Example from My Own Trading
I remember a trade I took on EUR/USD one week. The pair was in an uptrend, and I identified a strong support level around 1.1800. I waited for the price to come down to that level, and when it formed a bullish engulfing candle, I took the trade. The price reversed higher, hitting my profit target, and I walked away with a nice profit.

The key takeaway here is that you don’t have to rush. Patience is key. Let the market come to you, and wait for confirmation before entering.

Why This Strategy Works for Beginners

So, why does this simple strategy work so well for beginners? Here are a few reasons:

1. It’s Easy to Follow

Unlike complex strategies that require multiple indicators or calculations, this approach is straightforward. All I need are a few basic tools: identifying the trend, spotting support and resistance levels, and waiting for confirmation.

2. It’s Based on Price Action

By focusing on price action, I’m trading based on what the market is actually doing at the moment. This helps me avoid getting distracted by news events or other external factors that don’t directly impact the price.

3. It Doesn’t Require a Ton of Time

I don’t need to sit in front of my computer all day. This strategy works well with longer timeframes, such as the 4-hour or daily charts. I typically check my charts a few times a day and look for setups that align with my rules.

4. It Helps Manage Risk

By trading with the trend and using support and resistance levels, I’m always mindful of where to place my stop-loss. I’m not guessing where the market will go next—I’m reacting to what it’s doing in real-time. This keeps me from taking unnecessary risks.

Conclusion: Keep It Simple, Keep It Profitable

  • I’ve learned the hard way that sometimes the most complicated strategies can leave you frustrated and confused. But when I started trading with a simple forex strategy focused on identifying the trend, spotting support and resistance, and waiting for confirmation, my trading results started to improve.
  • If you’re just starting out, I highly recommend you give this approach a try. It’s easy to understand, requires minimal tools, and helps you stay disciplined. Plus, it gives you the chance to learn the ropes of forex trading without getting bogged down by unnecessary complexity.
  • Remember, trading is a journey. It doesn’t have to be complicated, and you don’t need to rush into things. Stick to the basics, follow the simple strategy I outlined, and with time, you’ll find yourself becoming more confident and consistent in your trades.

Next Article To Read:  How I Started Earning Dividends With Just $50


The Forex Risk Management Rules That Saved My Account

The Forex Risk Management Rules That Saved My Account

What I Wish I Knew Before I Blew My First Trade

Let me tell you a not-so-fun story: I once turned $500 into $37 in about two days.
Yep. That’s not a typo.

  • I thought I had everything figured out. I watched the tutorials, followed some “gurus” on Instagram, and thought I could outsmart the market. What I didn’t do was protect my account.
    And that’s when I learned that risk management isn’t optional — it’s survival.
  • If you’re just getting into trading, and you’re searching for “forex risk management for beginners”, take a deep breath. I’ve been where you are, and I’m going to walk you through the exact rules that helped me stop losing money recklessly — and eventually start growing it.

 What Is Risk Management in Forex, Really?

Before we dive into the “rules,” let’s talk basics.
Forex risk management is the process of protecting your trading capital by controlling how much you risk on each trade and how you handle losses.

Think of it as the seatbelt of trading. You hope you won’t crash, but if you do, you don’t want to fly through the windshield.

Why Beginners Ignore It (And Why I Did Too)

Like many new traders, I thought the goal was to win every trade. I chased profits, doubled down on losers, and didn’t use stop losses because “I’d just watch the trade.” Spoiler: I didn’t.

What I didn’t realize is that even the best traders lose sometimes — and the difference is they know how to lose properly.

Rule 1: Never Risk More Than 1–2% of Your Account on a Single Trade

This one sounds boring. But it’s the reason I’m still trading today.

How It Works:

  • Let’s say your account balance is $1,000.
    1% of that is $10. That means if you lose a trade, the most you’re losing is ten bucks.
    Not a big deal, right? But imagine losing $200 on one trade — it only takes a few of those to wipe you out.

Why It Matters:

  • It gives you room to be wrong (and you will be wrong sometimes).
  • It keeps you in the game long enough to learn and improve.
  • It turns trading into a process, not a gamble.
  • Personal tip: I started with 2% risk per trade. Once I had more experience and consistency, I occasionally upped it — but when I was brand new? Even 1% felt like a lot.

 Rule 2: Use a Stop Loss — Always

If you only remember one thing from this article, let it be this:

Use a stop loss on every trade. No exceptions.

What Is a Stop Loss?

It’s an automatic “exit” you set on your trade to limit your loss. You pick a price level, and if the market hits it, your trade closes — even if you’re asleep or staring at your phone wondering what went wrong.

My Painful Lesson:

  • I once entered a trade late at night, thinking the market would bounce back “soon.” I didn’t set a stop loss. I woke up to a -$120 loss on a $300 account.
  • That trade taught me the importance of boundaries. A stop loss isn’t just a tool — it’s a mental safety net.

Rule 3: Calculate Your Position Size (Don’t Guess)

This one changed the game for me.

What Is Position Sizing?

It’s figuring out how big your trade should be based on how much you’re willing to lose.

There are calculators online that make this super easy. You plug in:

  • Your account balance
  • Your risk percentage (e.g. 1%)
  • Your stop loss size in pips
  • And it tells you exactly how many units or lots you should trade.

Why Guessing Fails:

  • When I first started, I just picked a random lot size. Sometimes 0.1, sometimes 0.5. I had no idea what I was doing, and my results showed it.
  • Once I started calculating my trades, they became consistent. I knew what I was risking every time — no surprises.

 Rule 4: Don’t Overtrade — Less Is More

If you’ve ever stared at a chart thinking, “I need to trade something today,” then you know the overtrading bug.

Here’s What Helped Me:

  1. I limited myself to 1–2 trades per day max
  2. I took breaks when I had 3 losing trades in a row
  3. I started logging trades in a journal to stay accountable
  4. Trading isn’t a video game. You don’t get extra points for placing more trades.
  5. Sometimes the best trade is no trade.

 Rule 5: Accept That Losses Are Part of the Game

This one was emotional for me.

I used to beat myself up over every loss. I’d take revenge trades. I’d double my lot size to “get it back.” And I’d always end up making things worse.

What saved me was changing how I viewed losses:

  • A loss isn’t failure — it’s feedback
  • Risking small amounts made losses less emotional
  • Logging and reviewing trades turned mistakes into lessons
  • The moment I stopped trying to avoid losses altogether and started managing them? That’s when I finally started improving.

 Bonus Tip: Master Your Mindset

  • Trading is 20% strategy and 80% psychology.
  • If you don’t manage your emotions, even the best risk management rules won’t save you. I’ve had days where I broke all my rules because I was tired, angry, or just feeling reckless.

Now, before I trade, I ask myself:

  1. Am I trading for the right reasons?
  2. Am I sticking to my plan?
  3. Am I okay with the risk?

If the answer is no, I walk away — and trust me, that’s saved me more money than any winning trade ever did.

 Wrapping It All Up: My Forex Risk Management Rules

Let’s review the forex risk management rules for beginners that helped me stop blowing accounts and start building one:

  1. Never risk more than 1–2% per trade
  2. Always use a stop loss
  3. Calculate your position size based on your risk
  4. Don’t overtrade — be selective and patient
  5. Accept that losing is normal, and focus on staying consistent
  6. Keep your head straight — mindset is everything

Final Thoughts: You Don’t Have to Learn the Hard Way

  • I didn’t write this as an expert. I wrote it as someone who made almost every mistake and lived to tell the tale.
  • If you’re a new trader, forex risk management isn’t the “boring” part — it’s the part that keeps you in the game long enough to actually succeed.
  • No one wins all the time. But with the right rules in place, you don’t have to.

Next Article To Read:  The Simple Forex Strategy That Actually Worked for Me